dForce Fabric Billows and Character Dials
It’s been requested a few times that I show how, exactly, I run dForce sims to get the billowy fabric like I do and I keep putting it off (for reasons I don’t even have, honestly).
While I was at it, though, I figured I’d run through the character dial trick because it’s useful for quite a lot of dForce items – Mine especially – but it seems to be a slightly lesser known one unless you’ve been playing with dForce a bit.
Neither of these tricks are new. We’re certainly not reinventing the wheel and there have been plenty of other people who’ve shown how it’s done, I’m sure. They’re not particularly advanced, so even if you’re not used to messing with dForce, you should be able to get it working rather easily. This is mainly for those who want to use dForce and barely know where to start without going into Advanced Youtube Tutorials, but still give something play with aside from the basic drape steps.
First things First:Turn off absolutely everything in your scene that you don’t need.
If it isn’t colliding with the fabric, then you don’t need it. Alternatively, you can go under Parameters and set the ‘Visible in Simulation’ toggle to Off. Either way, banish it all.
˗ˏˋ Fabric Billows´ˎ˗
Once you have your figure posed and your dForce item loaded, open your timeline up – For the pretty billows of fabric, we’re not fighting with the wind nodes.
Your starting pose should be done on frame 0 – If you haven’t used the timeline in the scene yet, it should be there already, so you don’t have to worry about it.
If you want to get super fancy or you need to account for things intersecting with other figures or objects, you can adjust your pose on other keyframes like you normally would. If you’re doing that, though, then you probably already know what I’m showing here anyway and can bypass the rest of this journal.

1. Make sure you have ‘Start from Memorized Pose’ ticked to ‘On’ – For most dForce items, I find you’re going to get your best results doing that anyway, regardless of timeline use. I know it’s annoying sometimes, but it really is worth it.
Next, set “Frames to Simulate” to “Animated (Use Timeline Play Range)”
You can leave the timeline at the default settings of 31 frames or you can play around with the length of the sim. We’re keeping it at 31 for this.
2. Slide your trackbar to frame 5 or 10

Now move your whole figure in the opposite direction that you want your cloth to billow and drape.
Here I’ve moved it over to the right of the scene. You don’t need to move it very far for this to have dramatic results. In fact, if you move it too far in such a short number of keyframes, you’re risking a lot of clipping and probably an explosion.
Hit simulate and watch it like a hawk.

Ta Da. You have a nice, dramatic skirt billow! You can let the sim continue past the keyframe of movement to soften it more or pull it back to just before, depending on the results you’re aiming for.

Because we have everything turned off, the sims run fairly quick – This one took all of 1:04 from memorized pose to frame 31 and that’s with a multi-layer dress. That’ll vary a lot depending on what your simulating and how much you needed to leave in your scene, obviously, but I promise the timeline sims aren’t as scary as they seem.
˗ˏˋ Character Dial´ˎ˗
If you’re like me and prefer using custom dialed/sculpted characters that don’t follow any of the main figure shapes, clothing is a pain in the ass. Unless you want to spend the time creating custom morphs to match your figure, dialing in the character with dForce and timeline saves your sanity.
Most of the clothing items I’ve created actually work better with this method (mainly because I am broke and don’t own a lot of the Official Characters) and it often has some unexpectedly fun results with even simple items from other creators.
There are better tutorials out there than what I could manage to explain on how to create a custom master dial for your morph mixes, but you can also use this trick with a shaping preset.
1. Once again, you want the same simulation settings for Animated Timeline.
Get your pose lined out (and double check it with the character you want to use) on Frame 0. Then make sure your figure is devoid of morphs. You want it be the base shape and nothing else.

2. Drag your trackbar over to Frame 10 or 15.
The slower you do this, the more it’ll fit to your character. Do it fast and you’ll get an oversized look, many times (sometimes you still will anyway), or some interesting movements. Make sure you give enough space after the dial-in for the clothing to ‘settle’ on your figure if you’re not trying to add movement into the mix.
For this, I went with a halfway point to allow time for the drape to finish.
3. Set your dial to 100% or load in your shaping preset on this frame.

Aaand now you see those lovely mesh deformations. Delightful, aren’t they? Most of the time, those will ‘fall out’ with dForce, but sometimes they’re persistent nightmares I don’t have the willpower to fix on every single item for all of my characters.

dForceTricks 3 03
You can double check everything is working by dragging your trackbar back and seeing if the figure slowly reverts to base shape. If it is, then run your sim.


So much better.
˗ˏˋ Combine The Two´ˎ˗
See, that wasn’t much at all, right?
I use both of these in tandem for 90% of my sims to get the results you see in nearly all of my renders.
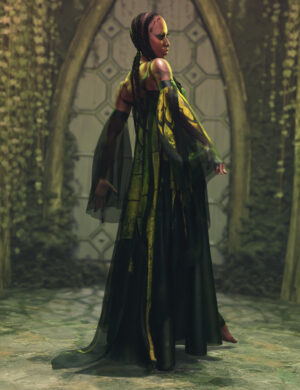
1. Start on Frame 0 for pose (and in this with the Princess Dress you absolutely want to make sure the ‘back ties’ are off).
2. Set the timeline to however many frames I think will be
3. Pick my movement keyframes (this time I slid the figure to the side and rotated on the y axis at different frames) and character dial spot


Then let the sim do its thing

And slide the trackbar through the frames until I find the one I want then finish setting up my scene around it.

That’s it!
That’s all there is. Now you know my ~secret~ to the sims.
The only final note to mention is that it doesn’t always work particularly well with hair. Some do well with it, some do not.
Hopefully it helps a little on your future dForce shenanigans.